Tuesday, September 17, 2013

Interactive Math Notebook: Factors and Multiples

Welcome to our Math Corner! Please come back often and leave a comment below to let me know your thoughts or any other ideas you have to add!  Also, I would love a follow! :) Thanks!

We have been busy working on determining whether one number is a factor or multiple of another number.  We started by building arrays both with tiles and on centimeter grid paper to determine a number's factors.  Becoming proficient at building arrays has really helped some of my struggling students feel successful in finding factors even when they aren't proficient in their facts or have many strong strategies to use to determine a fact.  After practicing many many times,  I gave each student a pair of die (some were six sided, some were more for my kids who are proficient in their facts and wanted a challenge!) and grid paper and instructed them to roll the die and create an array with dimensions that match the numbers on the die.  We then added this page to our notebooks.  Below is an example.  


Next, we used our Math Handbooks and its Table of Contents (oh hello, Language Arts skills! See....I'm learning how to incorporate it all!) to find the definition and examples of factor, prime number, composite number, and square number.  We used this information to create a foldable to glue into the right hand side of the page.  An example is below!


We are also learning about multiples.  After many days of discovering, discussing, and applying this knew knowledge, we finally were able to put the information into our notebooks.  I always try to wait until I feel they understand it to put it into the notebooks.  We used a hundreds chart to choose a factor, then highlighted all of its multiples.  We also used this factor to create a basic real world problem to show how to apply it to multiples.  
This student chose the factor two, and wrote the problem: A store has CDs for $2 each.  She then drew a picture to show that one CD would cost $2, two CDs would cost $4, three would cost $6, and so on.  This shows that the price of buying CDs are multiples of 2

This student chose the factor four.  His problem is about video games costing $4 each, so two would cost $8, three would be $12, and so on.  He goes on to begin to write a question associated with it!

Lastly, I really wanted to make sure we understood the difference between factors and multiples, as it can get very confusing.  We used markers to circle all the factors in a list and all the multiples associated with it.  Students were allowed to pick their own factor, or for those who are still not feeling comfortable with multiplication, were permitted to use the factor four as I did in my example.  Then, they showed an example of an array that shows one of their listed factors and multiples, as well as a non array (just to make sure they understood that an array is a rectangle and cannot have any pieces sticking off the end!!).  These last two pages might be my favorite!  


This student wrote all the problems for the number four.  He circled all of the fours to show that is the factor.  He wrote: 4 is a factor of any whole number that it divides evenly.  He also circled all the multiples to show that you can multiply any number by four to get a multiple of four.

This student did an excellent job of showing the difference between an array that four is a factor of one of its multiples, as well as a non example saying "21 is not a multiple of 4" and using his array as proof!


Tuesday, September 10, 2013

Arrays: The Gateway to Multiplication

Our first unit is all about factors, multiples, and arrays.  I know from teaching 5th grade that if students don't understand what multiplication truly shows, they are missing the foundation to a deeper understanding of numbers, as well as the key to success with many many other parts of math.  That is why I plan on really spending time this year developing a deep understanding of multiplication, how numbers are related, and strategies students can use to help them if they get stuck.

We first began, as always, using manipulatives.  We have these wonderful one inch tiles that are perfect for creating arrays, but connecting cubes work as well.  We discussed what the word "dimensions" mean when looking at the lengths of each side.  We started by practicing arrays with smaller numbers and built our way up.  Once I felt they understood, I put them in pairs and gave them each two numbers to find all the arrays for.  An example of our work is shown below! (Please ignore the fact that the array she has showing shows 4x5 and is not an array for 18!  She was actually building for their next number: 39)


This activity led into a discussion about why certain numbers had only one array, like 17.  It was a "prime" time to talk about prime numbers!  We displayed the posters throughout the room and refer to them often, especially when discussing multiples, factors, and special numbers!


If you have any suggestions for other awesome activities, or ways I can improve, please leave a comment below!  Thank you!

Monday, August 19, 2013

New Beginnings

Is it really that time again?!  SO SOON?  August has truly flown by, and all of a sudden we are starting school.  Except this year is going to be different.  You see, last year, and the three years prior to that, I drove over an hour each day to my school (68 miles!!).  While I loved my job, coworkers, students, and families, I needed to make a change.  I couldn't continue using up two hours of my day (and all my extra cash for gas!) so I accepted a job closer to home.  With this job is a different grade level (a 3-4 split....yowza) AND I get to teach all subjects (not just math as before)!  I haven't figured out yet how this will affect my blog, but I'm sure that will come in due time.  I look forward to doing math notebooks again, this year catering to 4th grade, while making many adjustments and improving it.  I am also learning a new math curriculum, Investigations.  Hopefully there will be lots of new and exciting ways to teach MATH!  And perhaps, if I feel ambitious, I will broaden the blog to include all the wonderful things we will be doing in Language Arts.  We shall see.....  :)

Friday, June 7, 2013

Wrapping up Notebooks: A time for Reflection

Last week was our last full week of school, so when Friday rolled around, we used our last full class together to wrap up our Interactive Math Notebooks.  When I told my students it would be our last entry, some loudly groaned and others said audible "Noooooo!'s"  I'll admit, I was sad too.  We had all grown fond of the days we would add a new entry.  They were all very excited that our last entry fell on page 100, which had been our goal for a while.  "Ms. McHugh!  We wrote a book that is 100 pages long!"  And it's true, we did write a book.  Who says Math and Language Arts don't go together??

Before adding our last page, I had created a word scramble page from SuperTeachers (currently a free feature).  Each of the words were math terms that could be found in their table of contents.  This was just a fun way to sum up our year together.  Next, we all sat on the floor (Kindergarten style, as I call it) and slowly flipped through each page of our Notebook.  This was by far the best part of that entire week.  They couldn't believe all we had learned and how far we had come!  Some mentioned that when we entered certain pages, they still had not understood it completely, but now at the end of the year, they "got it."  This was a great lesson to learn.  It doesn't always "click" for all our students at the same time.  But with a little bit of hard work and a lot of  perseverance, most students understood everything by the end of the year.  Our Notebooks were a great reminder of that.

After we reflected on the year as a class, I let them make their very last foldable.  This was a reflection on what they thought they were good at in math, things that were difficult or easy for them, and times that they had the most fun.  I must admit, most said they had fun when their teacher got distracted or off track.  What?  I have no idea what they are talking about......

Here are some of my favorites from that last day:

This one makes me smile :)


Who...me? No!


Fun is a theme in our room.  When we have fun, we are learning and it sticks!

Saturday, May 25, 2013

Interactive Math Journal: Fractions of Fractions

I've been promising my kids all year that I was going to teach them how to multiply fractions, and now with only 5 teaching days left, I can finally get to it.  Thursday, I introduced the lesson by giving each student multiple half sheets of paper.  Our first task was to find what 1/2 of 1/2 was.  We folded the paper in half vertically, colored half with one color crayon, then folded it in half horizontally and colored that half with a different color crayon.  The piece that had the two overlapping colors showed us what 1/2 of 1/2 was, or 1/4.  We then did the same activity again, but this time wondering what 1/2 of 1/3 was.  I kept recording our findings on the board.  At one point, I heard a gasp from Abbie.  She looked at me excitedly and kind of started bouncing in her seat.  I knew she had discovered something, but I asked her to hold on to her thoughts just a little longer.  As we kept going with the paper, I heard more and more gasps and "oh!!!!!" coming from the class.  I could tell some kids were getting frustrated that the others were discovering something they were not, so I finally let Abbie tell us what she first discovered.  Of course, she saw that we were making arrays with our papers, and noticed that all we had to do was multiply the denominators.  It was a different student that noticed that in each of our examples, the numerators were also multiplied.  It was an exciting moment for the class!! 

Then, someone raised their hand and asked, "Are we going to put this in our notebooks?"  To be honest, I hadn't thought of that, but they had such a great idea!  They actually wanted to add to their notebooks on their own!  YIPEE!!!  Since this activity took so long, we had to wait a day to enter it into our notebooks, but that gave me a chance to type up some blank rectangles to record our drawings in.  Here is the end result: 


This student chose pink and yellow to color with, so the overlapping piece is orange and shows the end result!

This student showed that 1/2 is shaded in yellow, while 3/4 is in pink.  The orange shows that 1/2 of 3/4 is 3/12!

This time, we included a "What I know" and "What I learned" section.  It should be on the left hand page, but oh well.  We are still learning!

Thursday, May 23, 2013

Interactive Math Notebooks: Adding and Subtracting Negative Numbers

With testing over, and the end in sight, we are working working working hard to stay on a routine and make sure we are ready for 6th grade!  We just finished a quick unit on negative numbers.  Manipulatives are great to use here and serve as a constant reminder of what is going on.  

First, we spent a couple days adding positive and negative numbers.  We used green counters for positive numbers, and red for negative.  We use these two colors throughout our unit.  I really putting an emphasis on the fact that adding is PUTTING TOGETHER.  This would later help with differentiating between the rules for adding negative and the rules for subtracting negatives.  After doing a few sample problems, the students were able to come up with their own rules for adding positive and negative numbers.  They quickly caught on and all was well in the world! (Don't worry.....subtracting is next....that's a WHOLE different ball game!)  Here are our notebook entries for adding:


Next, we began working on subtracting.  This time, I used a clear bucket to show what we had in the container, and what we needed to subtract, or take out.  Before giving them any tricks, we practiced many many times with counters.  For example, if the problem read: 8- (-4), I would fill the container with 8 green tiles, or 8 positives.  Then, I would ask if we were able to take out 4 red tiles.  Obviously, there were only green tiles in the container, so I couldn't take any out.  We had discussed earlier how the opposite of every number added together equals zero, so I demonstrated putting in groups of one red and one green tile at a time, until I had 4 reds to take out, all the while emphasizing that I wasn't changing the value of the container since I was just adding zero to it.  Then, I was able to take out the red counters, leaving only green behind.  This was not an easy concept to teach, and there were some frustrating looks around the room, but we kept at it until it slowly started clicking.  That's when I introduced Mr. Minus.  

Who is Mr. Minus, you ask?  It's more of a "what".  Mr. Minus is a poem my mother, Mrs. McHugh, also a 5th grade math teacher, made up years ago.  I owe her A LOT this year!  It goes like this:


Mr. Minus, Mr. Minus
Learn you I must
But I think I’m going to turn you into a plus,
Now change the second number to its opposite sign,
Add them both together and life will be fine!   Yeahhhhh!

It's catchy and the kids love it!  Here is our notebook page on subtracting.  Again, the pictures are of containers holding what we need to take out and the step by step change it goes through.  


Monday, May 6, 2013

Mother's Day Crafts

Let's take a break from math for just a moment to honor those amazing women in our lives: our mothers!  We took a moment after testing was over to create these wonderful plates.  Most students decorated the plate for their mother, but some included their dads and still others included their entire family.  I left it entirely up to them.  I purchased the plates from the Dollar Tree (a teacher's best friend!) after each student donated a dollar (one boy, Ben, donated $4 "in case someone else can't bring you the money."  Who said kids aren't compassionate?! I melted!).  I had them create a rough draft first, but once they realized baby wipes would wipe away mistakes, they lost all fear of messing up and got really creative!  This is an easy, awesome project and is all over Pinterest.  Just color your plate with Sharpies, and bake for 30 minutes at 350....and viola! A personalized gift :)  Check them out!

Allison chose to include her entire family with a descriptive word about each starting with the same letter as the first letter in their name; I love majestic mom! :)

They had so much fun displaying their love for their mothers!


Friday, May 3, 2013

Numerical Expressions: Common Core

Now that the OAA is over with and testing season is behind us, we are going to start focusing on some of the things that are included in the new CCSS that were not on the Ohio Standards, as well as touch on some things that I  think they need more exposure to to make sure they are ready for 6th grade.  

We have two great activities for numerical expressions today!  We learned about numerical expressions already, but I didn't feel like I covered it deep enough.  The Common Core is all about going deep with the concepts and really applying them to their lives.  We began by practicing oral expressions and displaying them numerically on their slates.  Here are some examples:


Twice a number, decreased by twenty-nine
Five times a number y increased by 3
Multiply three by two, then subtract one

Once we did enough practice and most of the kids had caught on consistently, we moved toward some independent work.  They didn't have a lot of problems, just ten, and most were asking the kids to analyze the expressions without evaluating them.  As they finished, there was an assignment on the projector waiting for them: our performance assessment.  I always find that if I ask them to write their own problem, I can really see if they understand what's going on.  

The CCSS is: 5.OA2: Write simple expressions that record calculations with numbers, and interpret numerical expressions without evaluating them. 

The performance assessment asked them to create their own real world problem that could use an expression, write the expression, and draw a picture to match.  Being able to see math in REAL LIFE situations AND create their own problems is a HUGE skill that is SO important!  Here were some of the final products: 

A basketball game ticket cost $17.  Hot dogs are $5.00.  If Molly and 6 friends go and all get hot dogs, how much money will they spend?  --Submitted by Molly K.

A ticket to the school dance costs 15 dollars.  A picture costs 10 dollars.  El and three friends each buy a ticket and each get a picture taken.  How much did they spend? --submitted by Shante J.

Ms. McHugh's class bought her 3 bags of chocolates.  Each bag has 10 pieces of chocolate.  Then, Mrs. Haught bought her 7 bags of hard candy.  Ms. McHugh ate 20 pieces of chocolate and hard candy all together.  How many pieces does she have left? --Submitted by Ashley M. (can you tell I LOVE candy??


Next, I had a challenge for them.  I found this idea on K-5 Math Teaching Resources, except I modified it for our purposes.  The task was to use only the digit 4 (the original says only four 4's, but we just stuck to 4s) to create problems equaling the numbers 1-12 so that you could place those numbers on a blank clock face.  Once they figured out a couple (4/4=1, and so on), they were unstoppable!  It was one of those classes where kids asked "can I finish this over the weekend??" even when it wasn't a required assignment!  Check out some of their clocks!! 


Truly, they learned the most from having to write their own problems.  We did a similar activity with division back in December, and I will definitely incorporate this task more next year!  It's just a great way to really see how they look at and see problems! Hope you enjoyed! 

Thursday, April 11, 2013

Technology: Finally!

We have Technoooooolllloooogy!!!! (Said in my best "Oprah's Favorite Things" voice).  Because we were able to build all new schools, we also received all new interactive whiteboards, as well as speakers in our ceilings and MICROPHONES!  If you know me at all, you know I love to sing, so my poor students always catch me singing into the microphone.  It always lightens the mood, especially during testing prep when things can get a little tense.

Today, I decided to slow things down a bit and let the students use the interactive whiteboard to show their answers on their homework.  Normally, I would just slide their paper under our document camera, but he's been feeling a little under the weather lately, so we've had to do without (I feel LOST without it, but we make do!).  We have been doing a lot of reviewing lately, as well as making connections between all the different areas of math, so last night's homework involved circle graphs, fractions, and percents.  We can ALWAYS review that!  They were given four frequency charts with information that they had to put into circle graphs using the fractions given.  Here are some pictures of a few of the students recreating their graphs;


Ben was the first brave soul to give it a try!  Pretty good!

Paige and TeShon hard at work!

The last class of the day seemed to have a hard time deciding which fraction was larger; 3/8 or 1/4, so we decided to use the highlight feature on the interactive whiteboard to give us a better visual.  As we were highlighting, I heard lots of  "ohhhhh!!!!!!"  The visual really helped, and it was so much easier with the interactive feature.  Check out the picture below!


 I can't wait to start  utilizing our new technology in the future!  Woo!


Tuesday, April 9, 2013

Probability: Math Notebooks

Today's Math Notebook was inspired by the WONDERFUL Mrs. Runde over at Runde's Room, although, I catered it to our needs.  I really liked how she had her students write out the learning goals and task before starting, so I decided to try it.  I always let the kids know what our goals for the day are, as well as have our "I Can" statements posted clearly in the room, but this is the first time we really put it in writing as a class.  We have been working with probability, so I decided to make a spinner as well. I also liked how she had the kids figure out a way to divide their circle in ten equal pieces as a nice review on dividing as well as remembering how many degrees are in a circle!  We also love working with protractors, so it was a nice review.   (We also had the chance to review equivalent fractions AND percents!  All in one activity! YAY!) Below is our page:


Because our goal was to compare theoretical results with actual results, and to make predictions, our notebooks ends up steering away from Runde's a little bit.  We have been having trouble creating frequency tables lately, so here was a great opportunity to do so.  I was going to have them do their experiment 20 times instead of just ten, so we based our theoretical results off of 20 (and reviewed equivalent fractions at the same time!)  I also had them come up with a prediction of what they thought would happen, based on their theoretical results.  Then, it was spin time!  They recorded their results in their frequency table and wrote out their conclusions based on their actual results.


Lastly, we met to talk about the reasonableness of certain results.  We used our theoretical results to determine if the actual result was reasonable or not.  Before this lesson, only 50% of my students answered a "reasonable or not reasonable" question correctly.  After this lesson, we were up to 87%!  I would say we succeeded!  :)

Algebraic Expressions and Math Notebooks

We covered Algebra way back in October and did a really great foldable for the four steps to follow when solving a problem with unknowns.  We came back to it today, both as a review, and to extend our thinking to expressions and patterns.  Our learning target for today was to introduce the use of algebraic expressions to represent situations and describe rules.  First, we watched this StudyJam on Function Tables, as well as one on Addition and Subtraction Equations and Multiplication and Division Equations.  We also did a sample problem in our notebooks, as shown below.  The problem reads:

Joe and Maria are 5th graders.  Joe is two inches taller than Maria.  

I asked the students to put this information into a function table and give me some measurements for Joe and Maria.  I reminded them to make them reasonable measurements for 5th grade students.  Of course, everyone had different answers, and all were acceptable as long as Joe was two inches taller.  Next, I recorded some of their measurements on the board and asked them to explain how they came up with Joe's height.  We also noticed that our function table was similar to the In and Out boxes they have become so familiar with using Everyday Math.  I asked them what the rule was for this table.  Of course, they all said "add 2!"  Then, I encouraged them to tell me the rule for finding Joe's height based on Maria's if we use m for Maria.  This was a little tricker, but with a little prompting, they said "m+2!" Now we're talking!


Next, we wrote some sample problems in our notebooks and came up with expressions to describe the problems (EDM 10.3):


After some more practice independently, I gave the students an opportunity to write their own problem situations that would require the use of a variable.  I forgot to capture this in a photo, but they did a really great job!  Being able to write their own, and accurately, made me feel confident in their understanding of expressions.

Capacity: Interactive Math Notebooks

Capacity is always fun!  Unfortunately, when moving to our new building, all the containers I had saved for this day were tossed thinking it was trash!  Can you believe it? Someone thought our old milk cartons and jugs were trash!  Anyway, I'm lucky to have a mom who also teaches 5th grade math (you should hear our phone conversations....very animated!) and because she had taught capacity the week before, she was willing to lend me her collection.  Saved by mom (again!).  After a lot of spilled water and "do you predict this container will hold two or three of these?" we moved into our notebooks to record our thoughts.

First, we wrote down the Big G.  Why didn't we have this when I was a kid??  I never remembered what the Gallon Bot was and it was way too difficult to recreate, but the Big G is EASY!  It's truly how I remember my conversions.  Here is a picture:


Next, I gave them a moment to free write.  I really wanted them to write down everything they knew about capacity, so each student's page is very different, but many chose to write down conversions based on the Big G.  I walked around making sure that they understood how to read it.  Here is one example:


Of course, there's also an anchor chart hanging in our room of the Big G that we refer to often, but I didn't feel the need to post it here because it is the same as the notebook page :)

Measurement and conversions: Interactive Math Notebooks

Again, I'm behind on posting this! Where does the time go?  We did measurement back in March, and while we did a lot with it, I'm just going to outline what we did with our notebooks in this post.  We began by discussing the two systems of measurement.  We decided the best way to organize this information was in a T chart (we REALLY like those around here!) and we wanted to keep all the types of measurement (length, capacity, weight) together as well.  Here is the list we came up with:


Next, we brainstormed some of the basic conversions we remembered for length for each system and wrote them down.  Lastly, we took notes on an easy way to convert between units of measurement.   A BIG "thank you" to my coworker Adrienne, the 4th grade math teacher, for sharing her mnemonic device!  Some of my students remembered it from last year!  She taught us that there are two ways to change units: to multiply or divide.  When converting from a Big unit to a Small unit, you Multiply, so we think "Best Soccer Mom."  When converting from a Small unit to a Big unit, you Divide, so we think "Silly Babies Dancing."  We always giggle at "Silly Babies Dancing!"


Below is the anchor chart hanging in our room to serve as a reminder.  Another "thank you" to Adrienne!  I got this straight from her!  Thank goodness for kind coworkers willing to share and kick around ideas with!


Surface Area: Interactive Math Notebooks

We didn't spend a lot of time on Surface Area after all the time we spent on area, perimeter, and volume.  I really just wanted the kids to understand the concept of it, not necessarily how to find it.  We will get to that later in the year.  So, in order to demonstrate the idea of surface area, I wrapped a box in wrapping paper to show that we needed to know how much paper to use to cover the box.  I also gave each student a net for a rectangular prism and asked them to color just one side to represent wrapping paper.  Then out came the interactive math notebooks!  We creased each net and glued them into our notebooks so that when they flip to that page, they can easily fold it back up to look like a 3-D shape!  Here is an example:


Because we just finished up volume, we made a T chart in order to make comparisons between volume and surface area.  I told the kids to think about a tool box or toy box to tell the difference.  Here is what we came up with as a class:

Add caption

 Well, there ya have it!  A quick and easy day!  Thank goodness for math notebooks!


Wednesday, April 3, 2013

Pi Day!

March 14. Finally. An ENTIRE DAY dedicated to MATH!  And it's PERFECT for 5th grade!  I started getting the kids excited about Pi day early in March.  Some knew that pi = 3.14, but they really didn't know much more than that.  I could feel the excitement as they entered the room that Thursday morning.  I only had 90 minutes with each class and each minute was accounted and planned for, so we got right to business. Here is an outline of our activities for the day!


1. Quiet morning activity: Write as many digits in pi as you can around a paper plate

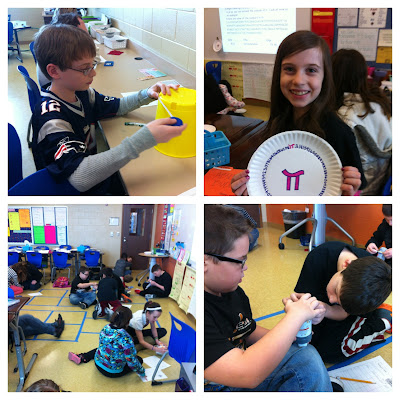
I used a paper plate for two reasons: I have 75 kids and they are CHEAP! And, of course, it's a circle.  The directions were on the projector when the kids walked in and they quickly figured out they needed to sit as close to the board as possible so as not to miss a single digit.  I only gave them about ten minutes to make their paper plate.  I wanted them to have something to take home to show their parents as well as something to study from for our Pi contest.  More on that later!  This activity also got them wondering what the heck pi was!  Here are some paper plate making shots:

Allison ended up getting 4th place in our pi contest!


Busy at work making their paper plates!


2. History of Pi

We found a short history of pi in our books, and discussed it briefly.  Many kids were fascinated by the fact that the definition of pi has changed so much throughout history (their teacher was fascinated too!).  I could feel the excitement building now!

3. Measurement of circles and discovery of pi

We briefly discussed using centimeters in our measurement and getting right down to the exact millimeter so that our measurements were as accurate as possible.  This was just a review for them.  We also discussed measuring diameter as going right down the center of the circle as well as reviewed what ratio meant since we were finding the ratio of circumference to diameter.  We did one example together, and off they went about the room.  I had a table full of circular objects for them to choose from, and a chart from superteacherworksheets.com to fill in as they went.  While they worked, I walked around and discussed findings, as well as helped troubleshoot when I could tell their measurements were off.  
All the lovely objects we have to measure!  Yes, that is my soap from my bathroom, and my coffee mug :) 

"Ms. McHugh, did you even wash out your mug?"  


Pretty accurate I would say!  

Partners hard at work measuring and loving every moment of it!

What a great day!

4. Discovery

Once we were finished, we had a lengthy discussion about what we learned.  Ultimately, I wanted them to see that the circumference of a circle was about three time its diameter.  We used our knowledge of finding the unknown (all our algebra work is paying off!) to figure out that if you don't know the circumference, but you do know the diameter, you can use pi to help you find it.  There were a couple ah ha moments at this point.  I literally saw the understanding unfold on Ivy's face!  It was neat to see her go through the process of understanding using our measuring activity and finding 3.14 was (about) the ratio each time, to knowing that she could always use that to find circumference.  These are the moments people!  The ah ha moments! :)

5. Short video

We always try to wrap up with a short video from StudyJams, and today was no different.  It gives them a chance to listen to someone else talk about what we learned and they do a great job of putting concepts into real world situations.  If you haven't checked out StudyJams yet, I encourage you to do so!

6. Cookies

On a day like today, you have to have a fun treat!  Every student received a cookie, but don't worry, we found its diameter and circumference first!  YUM!


7. Contest time!
Lastly, I held a digit reciting contest.  I gave them until the next day to see how many digits they could memorize in pi.  It was completely optional and just for fun.  I was so impressed by how many students really got into it, and memorized WAY more digits than I ever could!  Our winner was Cale: he memorized 78 digits!  WOW!


All in all, this will stand to be one of my favorite days of the year.  I think my students would have to agree!